


 Syntax
| Visual Basic (Declaration) | |
|---|---|
Public Property ProxyUrl As String | |
| C# | |
|---|---|
public string ProxyUrl {get; set;} | |
Remarks
Accessing a KmlLayer is unique in that ArcGIS Server is not required to view geographic information. Since the KmlLayer is based upon a KML or KMZ file, all that is required is a web server to host the KML/KMZ file. NOTE: ArcGIS Server has the ability to host geographic web services created in ArcMap as native KML/KMZ files.
Developers who wish to test the KmlLayer functionality using KML/KMZ files locally on their development machine have the following options:
Option #1: Developers can place the KML/KMZ file in the ClientBin directory of the test web site that is generated when creating a Silverlight application using Visual Studios built in web server (i.e. the directory that has the path: ..\[APPLICATION_NAME].Web\ClientBin). This option is the easiest method for testing KML/KMZ files when there is no web browser security issues because all of the KML/KMZ functionality is self contained. See the code example in the KmlLayer.Url Property for one common workflow example of Option #1.
NOTE: If the KML/KMZ file has hyperlinks (i.e. they begin with http://) to resources (such as other KML/KMZ files) to locations outside of your local network, IT WILL BE REQUIRED to use Option #2 for local testing of KML/KMZ files. Some common KML tags (or nested sub-tags) that can use external hyperlinks outside of your local network include the following: <href>, <Style>, <Icon>, <IconStyle>, <StyleMap>, <NetworkLink>, and <styleUrl>. Additionally, if you get a Security Exception or unhandled exception 4004 errors in Visual Studio during your Silverlight application debugging, you will most likely need to use Option #2 instead.
Option #2: If the developer has installed a web server on the same computer as Visual Studio (for example: Internet Information Server (IIS)), then they can place the KML/KMZ file in an application directory of their local web server (i.e. http://localhost). Using this option has the additional requirements of:
- Setting up the correct MIME type on the web server to handle KML/KMZ files
- Adding a crossdomain.xml file to the root of the web server
- Making use of a proxy to avoid Security Exception error messages
See the code example in this document for one common workflow example of Option #2.
Property Value
The Proxy URL string.Example
The following steps show one example of how a developer could test a KML file that is on the local development computer with external hyperlink dependencies to another KML file outside of the local network using Microsoft IIS web server on a Windows 7 Operating System (it is assumed that IIS is installed):
Step 1: Setting up the correct MIME type on the web server to handle KML/KMZ files
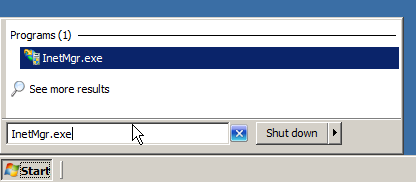
- Type InteMgr.exe in the Windows 7 Search programs and files taskbar and hit Enter to launch Internet Information Service (IIS) Manager application (see the following screen shots):
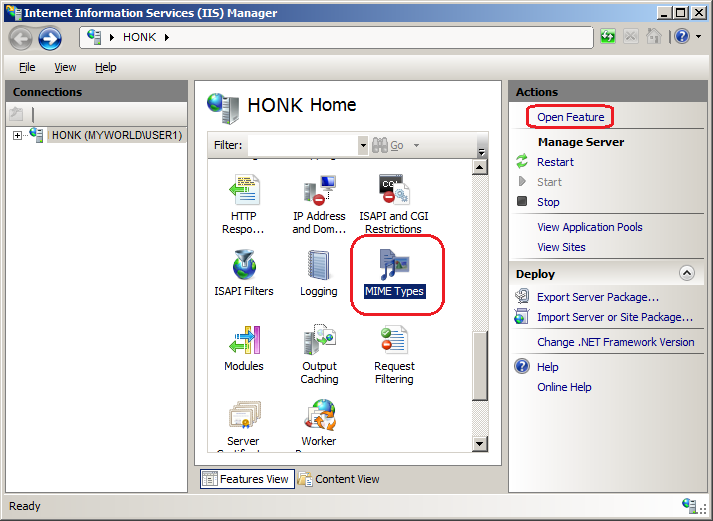
- Click on the Features View tab and scroll down to the IIS section. Select the MIME Types icon and in the Actions area click the Open Feature hyperlink (see the following screen shot):
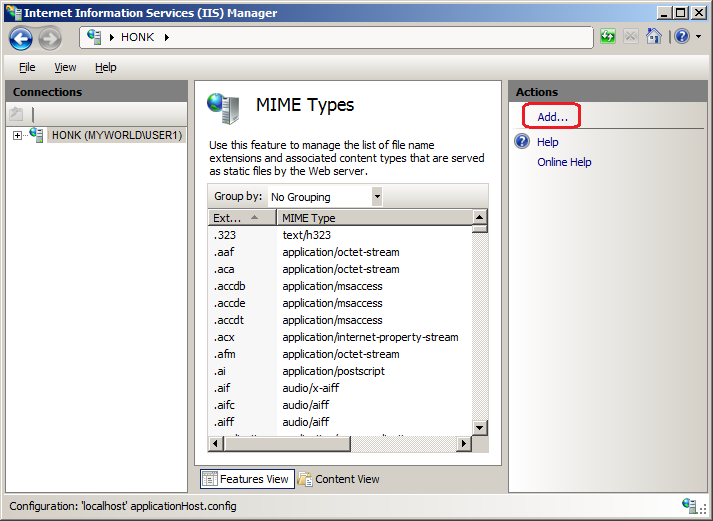
- Click the Add... hyperlink to launch the Add MIME Type dialog (see the following screen shot):
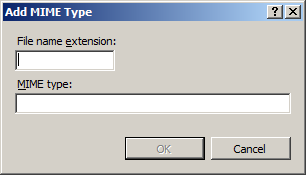
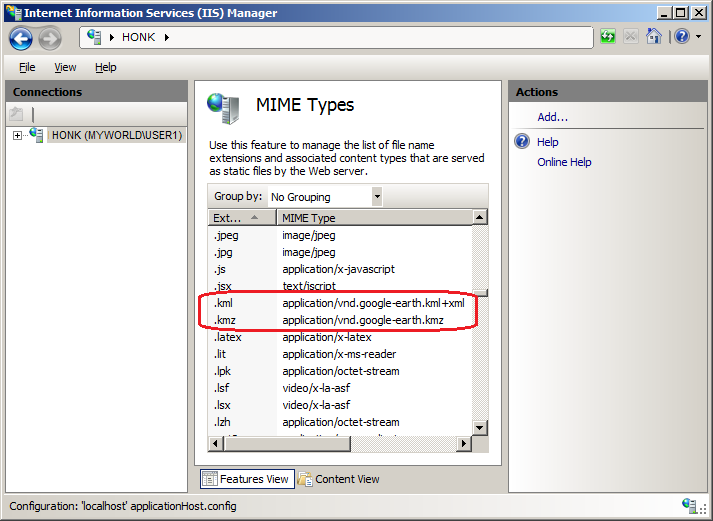
- Add the correct MIME Type for both the KML and KMZ file types and click OK in the dialog for each entry using the values:
KML:
File name extension: .kml
MIME type: application/vnd.google-earth.kml+xml
KMZ:
File name extension: .kmz
MIME type: application/vnd.google-earth.kmz
The Internet Information Service (IIS) Manager application should look like the following screen shot when completed:
- Close the Internet Information Service (IIS) Manager application.
- NOTE: Refer to the following Google and Microsoft documents for more information on KML/KMZ MIME types in IIS: KML Tutorial and Working with MIME Types (IIS 6.0).
Step 2: Adding a clientaccesspolicy.xml file to the root of the web server
For security reasons, the Silverlight runtime restricts access to data and services for specific classes across schemes, domains, and zones. These restrictions impact the ArcGIS Silverlight API when the KML/KMZ file has hyperlinks (i.e. they begin with http://) to resources (such as other KML/KMZ files) to locations outside of your local network. You need to create a client access policy file on the local web server to enable access to resources outside of your local network. Perform the following actions to set up using a clientaccesspolicy.xml file:
- Right click on the following hyperlink: http://services.arcgisonline.com/clientaccesspolicy.xml and choose Save Target As... to save a local copy of the clientaccesspolicy.xml file on your local hard drive. This file was created for use on ArcGIS Online but is sufficient for http://locahost testing on a development computer.
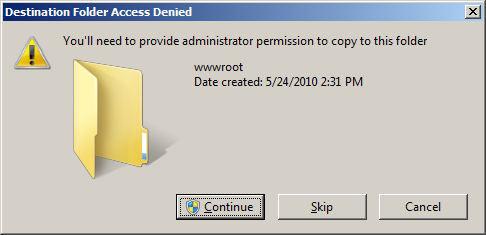
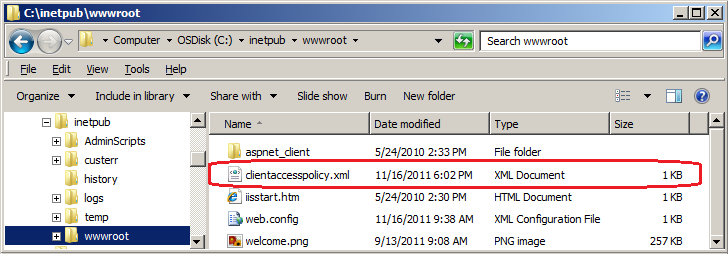
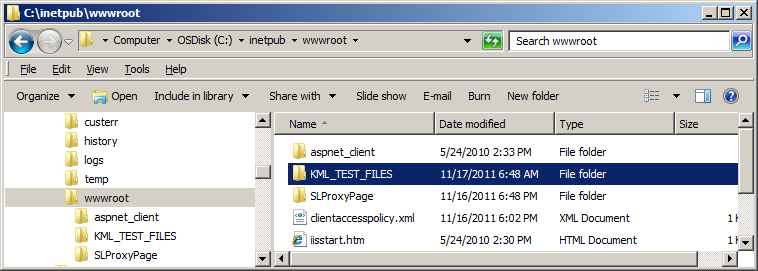
- Copy the clientaccesspolicy.xml file into the C:\inetpub\wwwroot folder of the development machine that has IIS installed. You may need Administrator privileges to copy the file. If you get the Destination Folder Access Denied dialog, just click the Continue button to copy the file (see the following screen shots):
NOTE: For more information on the necessity and use of clientaccesspolicy.xml files refer to the ArcGIS Resource Center Blog document Using services across schemes.
Step 3: Making use of a proxy to avoid Security Exception error messages
Again as part of the Silverlight runtime security restrictions developers need a proxy service to broker Web requests between the Silverlight client and the KML/KMZ files. The proxy adds credential information that allows the web server to access the KML/KMZ files. Perform the following actions to set up using a proxy on the local web server:
- Using Windows Explorer, create a C:\ProxyDownload directory on the development computer.
- Right click on the following hyperlink: http://help.arcgis.com/en/webapi/silverlight/help/SLProxyPage.zip and choose Save Target As... to save a local copy of the SLProxyPage.zip file to the C:\ProxyDownload directory on your local hard drive. This file was created by ESRI as a starting point for customization in using proxies.
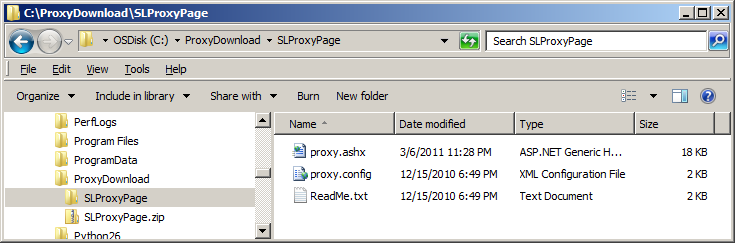
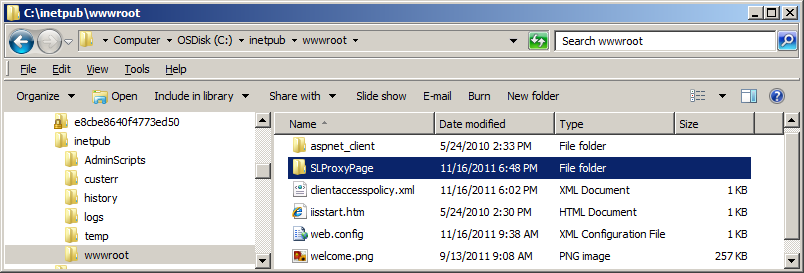
- Using a ZIP/UNZIP application (like 7 Zip or WinZip) extract the compressed SLProxyPage.zip file onto your development computer’s hard drive. This will explode out the folder C:\ProxyDownload\SLProxyPage with three files: proxy.ashx, proxy.config, and ReadMe.txt (see the following screen shot):
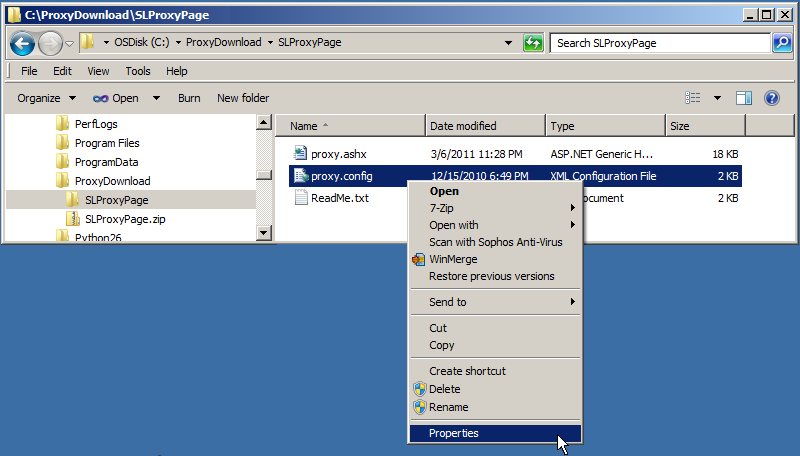
- In Windows Explorer, navigate to the C:\ProxyDownload\SLProxyPage directory, right click on the proxy.config file and choose Properties (see the following screen shot):
- In the proxy.config Properties dialog, uncheck the Read-only attribute and click Apply (see the following screen shot):
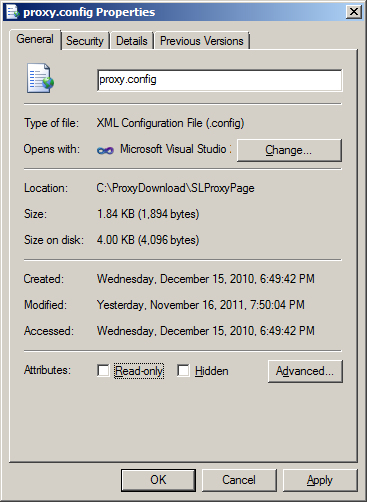
- Then click OK to close the proxy.config Properties dialog.
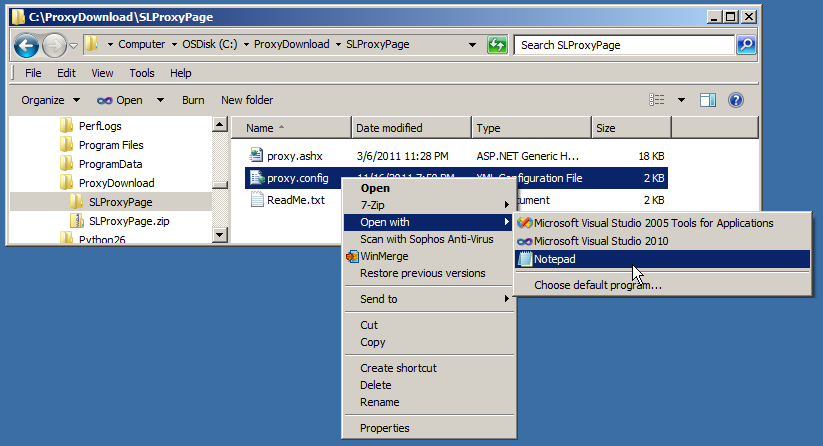
- In Windows Explorer, right click on the C:\ProxyDownload\SLProxyPage\proxy.config file and choose Open with Notepad (see the following screen shot):
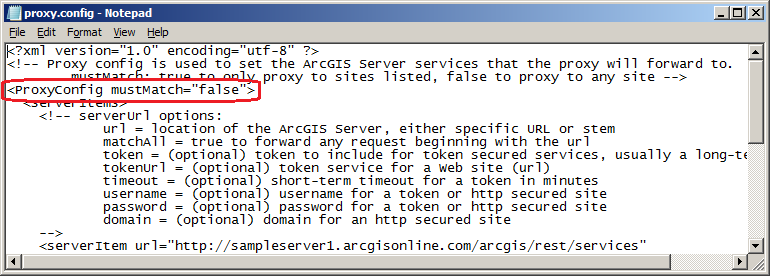
- Change the 4th line from: <ProxyConfig mustMatch="true"> to: <ProxyConfig mustMatch="false">, save the file and close it (see the following screen shot):
- Copy the C:\ProxyDownload\SLProxyPage folder into the C:\InetPub\wwwroot folder of the development machine that has IIS installed. You may need Administrator privileges to copy the file. If you get the Destination Folder Access Denied dialog, just click the Continue button to copy the file (see the following screen shots):
- Type InteMgr.exe in the Windows 7 Search programs and files taskbar and hit Enter to launch the Internet Information Service (IIS) Manager application (see the following screen shots):
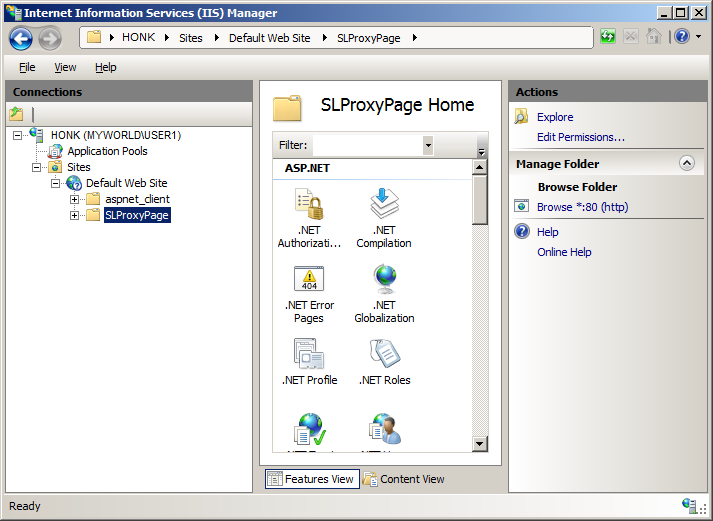
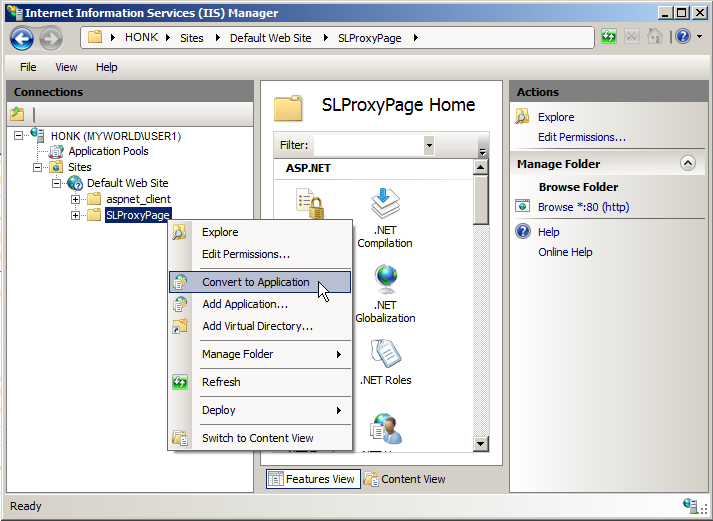
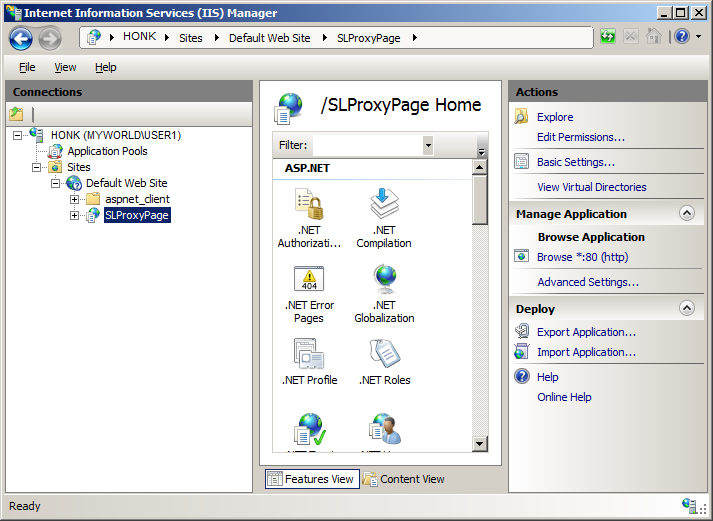
- In the Internet Information Services (IIS) Manager application, right click on the SLProxyPage folder and choose Convert to Application (see the following screen shot):
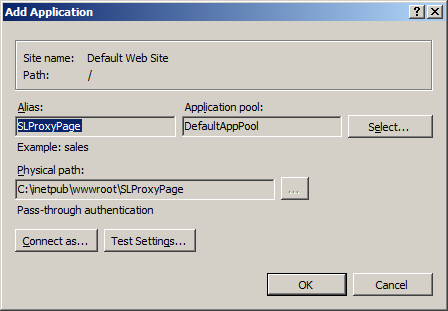
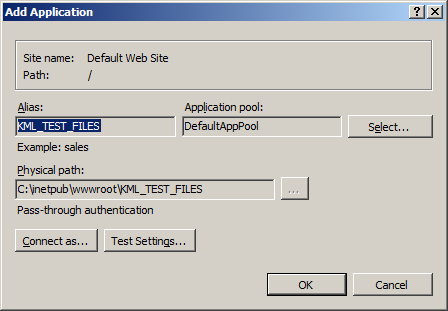
- In the Add Application dialog, accept the defaults and click OK (see the following screen shot):
- This will change the icon for the SLProxyPage folder to be a web application in IIS (see the following screen shot):
- Close the Internet Information Services (IIS) Manager application.
- NOTE: To learn more about how proxies work refer to the ArcGIS Resource Center document Secure Services.
Step 4: Create the KML file that has resource links to external sources outside of the local network and add to IIS as an application folder
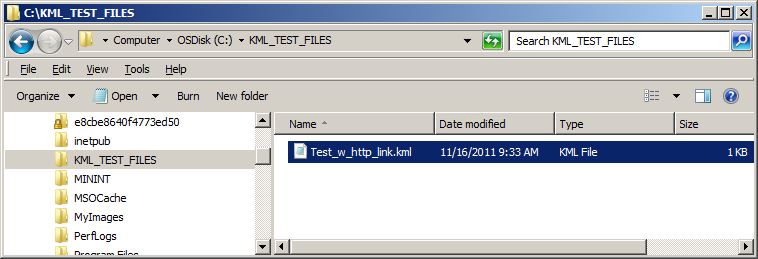
- Using Windows Explorer, create a new folder on the hard drive of the development computer. Name the folder C:\TEST_KML_FILES.
- Using the text editor application, Notepad, copy the following KML syntax and save the file as C:\ TEST_KML_FILES \Test_w_http_link.kml:
<?xml version="1.0" encoding="UTF-8"?> <kml xmlns="http://www.opengis.net/kml/2.2"> <Document> <name>TEST WITH http LINK</name> <visibility>1</visibility> <open>1</open> <StyleMap id="styleMap"> <Pair> <key>normal</key> <styleUrl>http://code.google.com/apis/kml/documentation/KML_Samples.kml#normalPlacemark</styleUrl> </Pair> <Pair> <key>highlight</key> <styleUrl>http://code.google.com/apis/kml/documentation/KML_Samples.kml#highlightPlacemark</styleUrl> </Pair> </StyleMap> <Placemark> <name>Simple placemark</name> <visibility>true</visibility> <open>0</open> <styleUrl>#styleMap</styleUrl> <Point> <coordinates>-122.0822035425683,37.42228990140251,0</coordinates> </Point> </Placemark> </Document> </kml> - Use Windows Explorer to confirm you have a the C:\KML_TEST_FILES\Test_w_http_link.kml file created (see the following screen shot):
- Copy the C:\TEST_KML_FILES directory to the C:\inetpub\wwwroot folder (see the following screen shot):
- Type InteMgr.exe in the Windows 7 Search programs and files taskbar and hit Enter to launch Internet Information Service (IIS) Manager application (see the following screen shots):
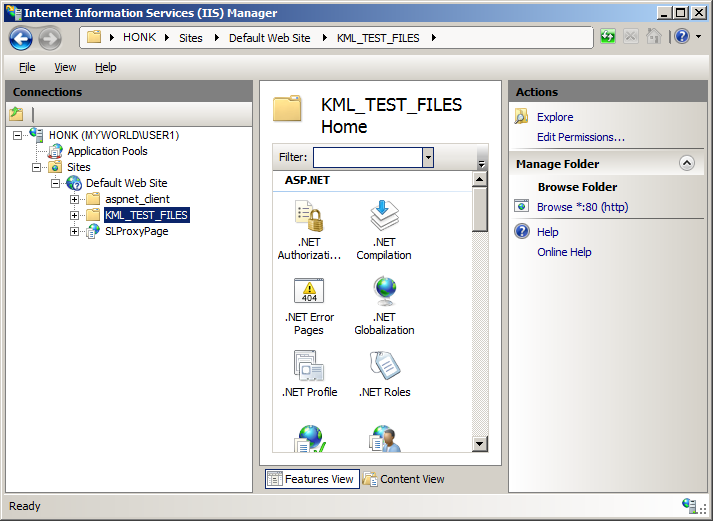
- In the Internet Information Services (IIS) Manager application, right click on the KML_TEST_FILES folder and choose Convert to Application (see the following screen shot):
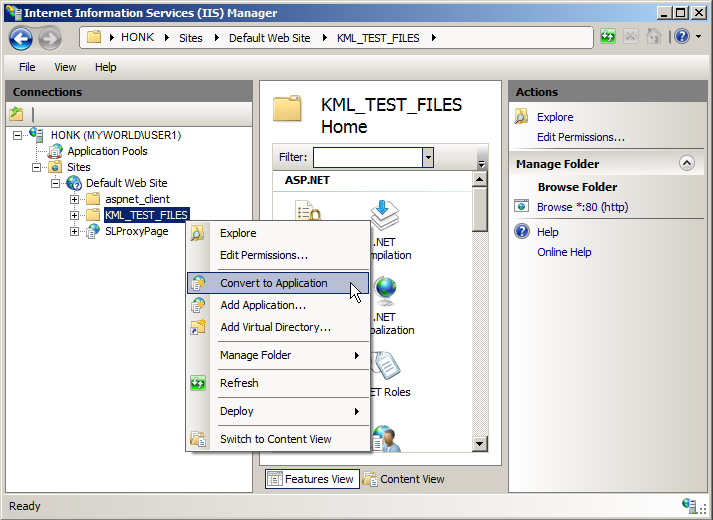
- In the Add Application dialog, accept the defaults and click OK (see the following screen shot):
- This will change the icon for the KML_TEST_FILES folder to be a web application in IIS (see the following screen shot):

- Close the Internet Information Services (IIS) Manager application.
Step 5: Create a Visual Studio application to test the KML file that has references to resources (i.e. other KML files) on different networks
- Launch Visual Studio 2010.
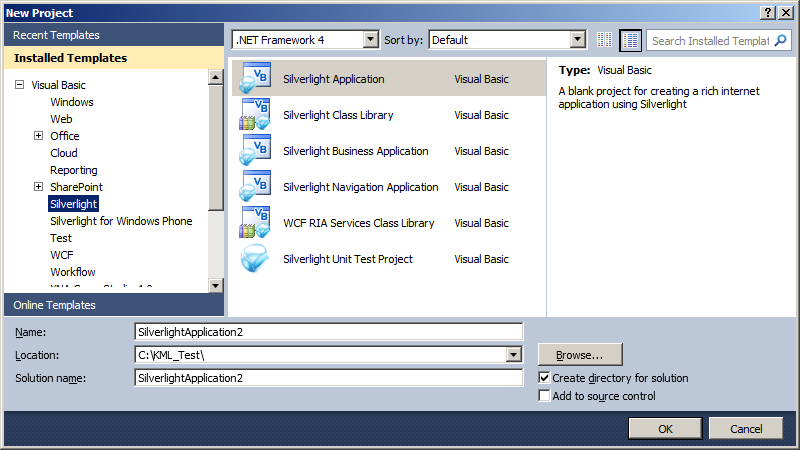
- Choose File | New Project from the Visual Studio menus.
- In the New Project dialog, expand .NET Language of your choice (Visual Basic shown in this example), click on the Silverlight Template, choose Silverlight Application, and specify the following information in the textboxes:
- Name: SilverlightApplication2
- Location: C:\KML_Test\
- Solution name: SilverlightApplication2
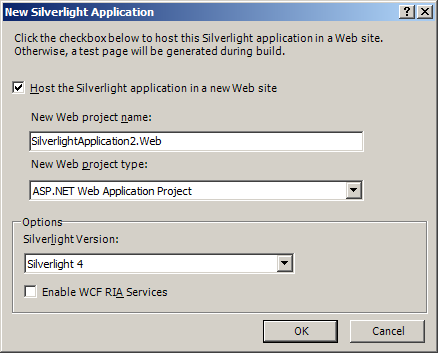
- In the New Silverlight Application dialog, accept the defaults (make sure the Host the Silverlight application in a new Web site is checked). This will use the Visual Studio built-in web server (Cassini) for launching your Silverlight application (see the following screen shot):
- Drag an ESRI Silverlight API Map Control onto the MainPage.xaml design surface.
- Add the following additional Reference to the Visual Studio Project: ESRI.ArcGIS.Client.Toolkit.DataSources.
- Replace the XAML code in the MainPage.xaml with the following:
<UserControl x:Class="SilverlightApplication2.MainPage" xmlns="http://schemas.microsoft.com/winfx/2006/xaml/presentation" xmlns:x="http://schemas.microsoft.com/winfx/2006/xaml" xmlns:d="http://schemas.microsoft.com/expression/blend/2008" xmlns:mc="http://schemas.openxmlformats.org/markup-compatibility/2006" mc:Ignorable="d" d:DesignHeight="300" d:DesignWidth="400" xmlns:esri="http://schemas.esri.com/arcgis/client/2009"> <Grid x:Name="LayoutRoot" Background="White"> <esri:Map Background="White" HorizontalAlignment="Left" Name="Map1" VerticalAlignment="Top" WrapAround="True" Height="276" Width="376" Margin="12,12,0,0"> <esri:Map.Layers> <esri:LayerCollection> <esri:ArcGISTiledMapServiceLayer Url="http://services.arcgisonline.com/ArcGIS/rest/services/World_Street_Map/MapServer" /> <esri:KmlLayer Url="http://localhost/KML_TEST_FILES/Test_w_http_link.kml" ProxyUrl="http://localhost/SLProxyPage/proxy.ashx"/> </esri:LayerCollection> </esri:Map.Layers> </esri:Map> </Grid> </UserControl> - Choose Build | Build Solution from the Visual Studio menus (you should not have any compiler Errors/Warnings).
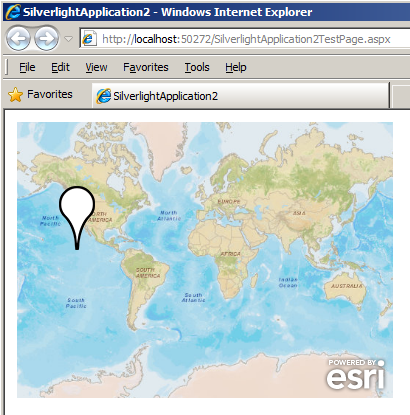
- Hit F5 (or click the Start Debugging button) in Visual Studio to launch the Silverlight application in Internet Explorer. You should get an image that appears like the following (a single upside down white tear drop in San Francisco). Although the KML file is hosted locally on the same development machine as the Silverlight application, the Test_w_http_link.kml has a http:// link to another KML document outside of our local network (i.e. http://code.google.com/apis/kml/documentation/KML_Samples.kml) (see the following screen shot):
Requirements
Target Platforms: Windows XP Professional, Windows Server 2003 family, Windows Vista, Windows Server 2008 family, Windows 7